
Basements are often overlooked or underutilized parts of a home, but finishing out basement walls can dramatically transform a cold, concrete space into a warm, functional extension of your living area. Whether you’re building a family room, home office, gym, or guest suite, finishing the walls is a key step in making your basement truly livable.
In this comprehensive guide, we’ll walk you through everything you need to know to finish out basement walls—including insulation, moisture protection, framing, drywall, and finishing touches. Plus, we’ll include budget-friendly options and pro tips to help you avoid common pitfalls.
Why Finish Basement Walls?
Before diving into the process, let’s quickly review the benefits of finishing basement walls:

- Increases Home Value: A finished basement adds usable square footage.
- Improves Energy Efficiency: Insulated walls keep temperatures stable and reduce utility costs.
- Enhances Comfort: A finished wall looks and feels much more inviting than bare concrete.
- Protects Against Moisture & Mold: Proper finishing includes moisture barriers and drainage improvements.
- Expands Functionality: Opens up potential for bedrooms, media rooms, offices, and more.
Read More: DIY Basement Remodeling with Concrete Block Walls: A Complete Homeowner’s Guide
What You’ll Need
Here’s a list of tools and materials commonly required for finishing basement walls:
Tools:
- Circular saw
- Drill/driver
- Level
- Hammer
- Tape measure
- Chalk line
- Utility knife
- Caulking gun
- Staple gun
Read More: How to Finish a Basement Wall: DIY Guide for Homeowners
Materials:
- Pressure-treated lumber (for framing)
- Construction adhesive
- Concrete screws or nails
- Rigid foam insulation / fiberglass insulation
- Vapor barrier (plastic sheeting)
- Drywall or wall panels
- Joint compound & tape
- Paint or wall finish
- Electrical boxes & wiring (if installing outlets/lights)
Read More: How to Finish a Basement Wall (DIY): A Complete Step-by-Step Guide
Step-by-Step: How to Finish Out Basement Walls
Step 1: Inspect and Waterproof
Before any construction, check for water issues.
- Seal Cracks: Use hydraulic cement or epoxy to fill wall and floor cracks.
- Apply Waterproofing: Use a masonry waterproofing product like Drylok to seal the walls.
- Test for Moisture: Tape plastic sheeting to a wall for 24-48 hours. If condensation forms behind it, you may need additional waterproofing.
Pro Tip: Install a perimeter drain or sump pump if you have recurring water problems.
Read More: How to Build Finished Walls in a Basement: A Step-by-Step DIY Guide
Step 2: Add Rigid Foam Insulation
This step improves insulation and adds a vapor barrier.
- Cut foam boards to fit between the floor and ceiling.
- Attach using construction adhesive and concrete screws.
- Seal all seams with foil tape.
- Apply spray foam around the edges and corners for airtight insulation.
Why Rigid Foam? It’s mold-resistant and won’t degrade like fiberglass if moisture gets in.
Read More: How to Make an Unfinished Basement Usable: Budget-Friendly Ideas for Every Home
Step 3: Frame the Walls
Build stud walls to support drywall or paneling.
- Use pressure-treated wood for any lumber that touches concrete.
- Space studs 16″ apart (on-center).
- Secure the bottom plate to the floor using masonry nails or concrete anchors.
- Attach the top plate to ceiling joists.
You can either build walls in place or pre-assemble them and tilt into position.
Read More: 130 Best Unfinished Basement Ideas to Transform Your Space
Step 4: Install Electrical Wiring (If Needed)
Plan where you want outlets, light switches, or wall sconces.
- Run wires through drilled holes in the studs.
- Install outlet boxes flush with the future drywall.
- Follow your local electrical code or hire a licensed electrician if unsure.
Pro Tip: Code usually requires outlets every 12 feet in finished basements.
Read More: How to Add Support to Basement Ceiling Joists: A Complete DIY Guide
Step 5: Insulate the Wall Cavities
Add insulation between the studs for noise reduction and extra warmth.
- Use unfaced fiberglass batts or mineral wool for superior soundproofing and fire resistance.
- Staple insulation in place and ensure there are no gaps.
Optional: Add a plastic vapor barrier over the insulation if not using drywall with a built-in barrier.
Read More: 68 Best Exposed Basement Ceiling Ideas for a Stylish and Functional Space
Step 6: Hang Drywall or Wall Panels
Now it’s time to finish the walls.
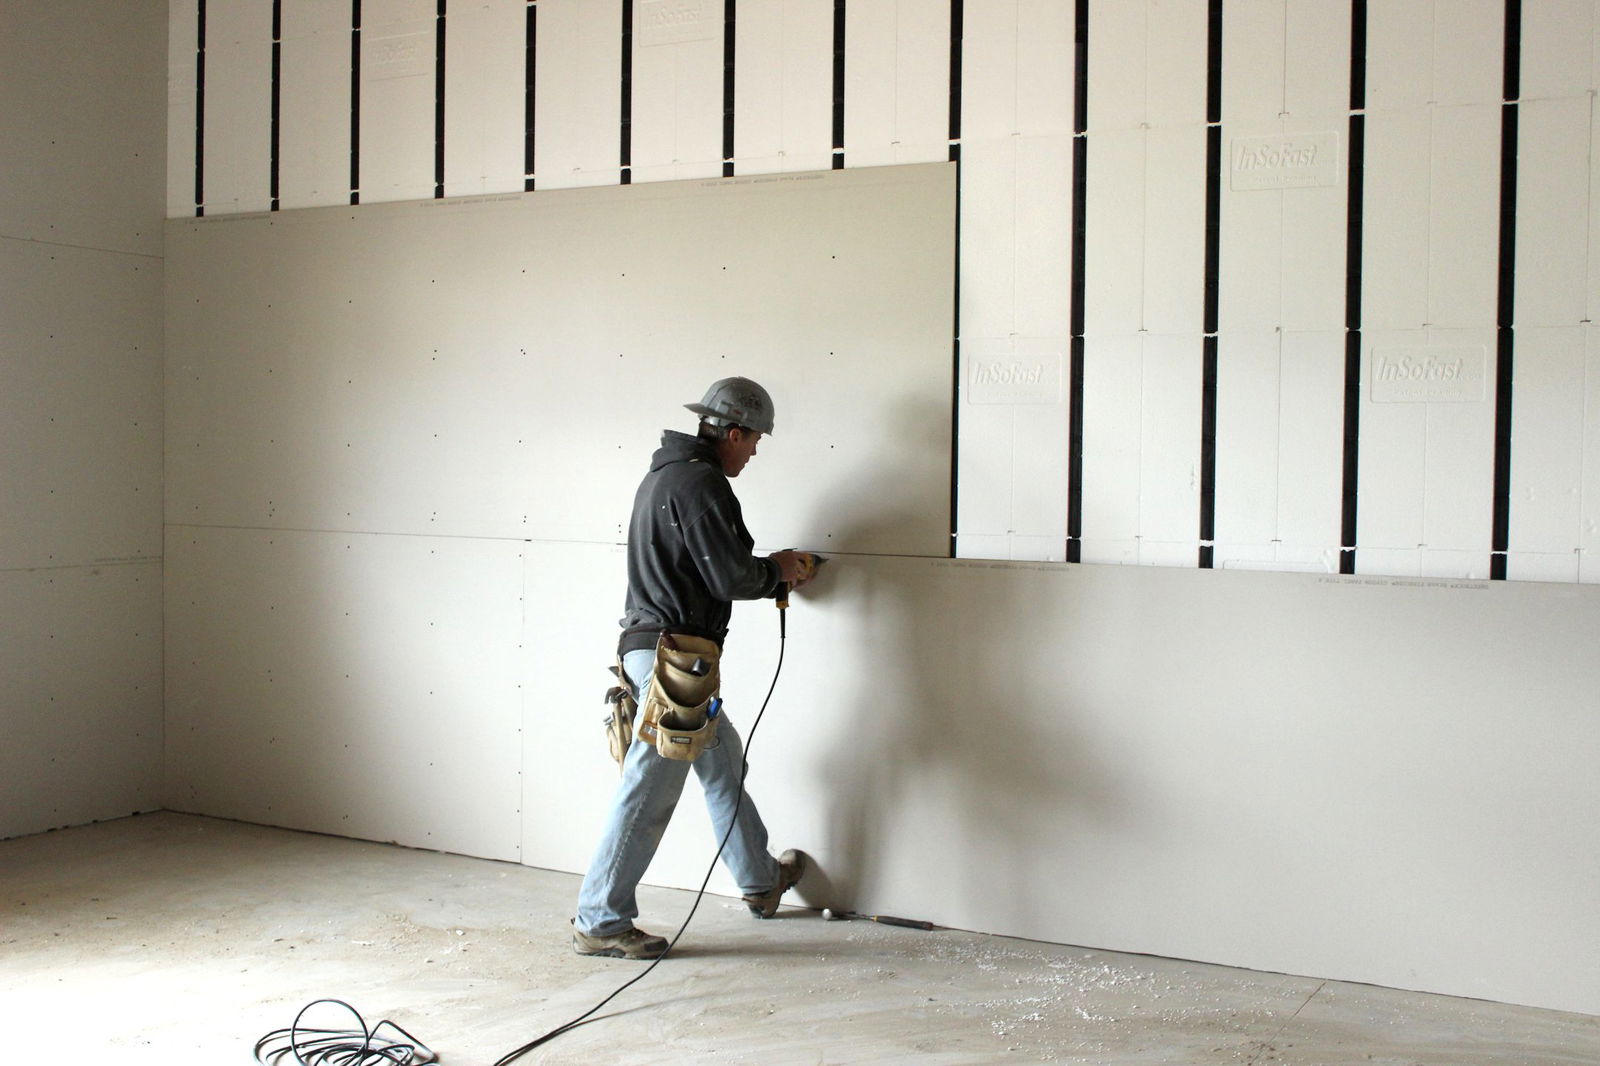
- Use moisture-resistant drywall (green board) for basements.
- Hang sheets horizontally or vertically using drywall screws.
- Tape seams with joint tape and apply joint compound in several coats.
- Sand smooth between coats for a polished surface.
Alternatives to drywall include:
- Wood paneling: Adds warmth and character.
- Shiplap: Trendy and rustic.
- Vinyl wall systems: Mold-resistant and easy to clean.
Read More: Need Advice for How to Finish Basement Ceiling? Here’s What You Should Know
Step 7: Prime and Paint
Choose a light color to make your basement feel larger and brighter.
- Apply a primer designed for drywall.
- Use moisture- and mildew-resistant paint.
- Consider satin or eggshell finishes for easy cleaning and slight reflectivity.
Read More: DIY Basement Ceiling Ideas and Renovation Tips
Design Ideas for Finished Basement Walls
Once your walls are finished, decorate them to match your basement’s purpose:
| Basement Purpose | Wall Ideas |
|---|---|
| Home Office | Neutral paint, floating shelves, sconces |
| Media Room | Dark colors, acoustic panels, LED strips |
| Gym | Mirrors, industrial-style lighting |
| Family Room | Warm tones, art gallery wall |
| Guest Room | Wallpapered accent wall, cozy textures |
Read More: Transforming Our Unfinished Basement Ceiling: A Complete DIY Guide
Additional Finishing Tips
- Trim and Baseboards: Add finished trim for a professional look.
- Ceiling Options: Drop ceiling, drywall ceiling, or exposed joists (painted black or white).
- Lighting: Use recessed lights to maximize headroom.
- Flooring: Choose vinyl plank, carpet tiles, or sealed concrete for moisture-resistance.
Read More: Basement Finish Timeline: How Long Does It Really Take to Finish a Basement?
Estimated Cost to Finish Basement Walls
| Task | Estimated Cost (DIY) |
|---|---|
| Waterproofing | $100 – $500 |
| Insulation (Foam & Batts) | $300 – $1,000 |
| Framing Materials | $500 – $1,200 |
| Electrical (basic installation) | $200 – $500 |
| Drywall & Finishing | $600 – $1,500 |
| Paint & Supplies | $100 – $300 |
| Total | $1,800 – $5,000+ |
Hiring professionals will increase costs by 40–100% depending on scope.
Read More: Refinishing Your Basement: A Comprehensive Guide
Final Thoughts
Finishing out basement walls is one of the most rewarding home improvement projects you can tackle. With the right preparation, materials, and a bit of patience, you can turn a cold, damp basement into a vibrant and livable part of your home. From insulation to drywall and décor, each step adds comfort, value, and beauty.
Ready to start your basement transformation? If you’d like help with product recommendations, layout design, or cost planning, just let me know—I’m here to assist!