
Renovating your basement is one of the most rewarding home improvement projects—adding square footage, functionality, and even resale value. But before you turn that dark, unused space into a cozy bedroom, playroom, or home office, there’s one essential feature you cannot ignore: the egress window.
This comprehensive guide to egress windows for basement renovations will help you understand their purpose, code requirements, installation tips, style options, and cost considerations. Whether you’re planning a DIY upgrade or hiring a contractor, this resource will ensure your renovation is safe, code-compliant, and value-boosting.
What Is an Egress Window?
An egress window is a window that serves as an emergency exit route in the event of a fire, flood, or other emergency. It’s legally required in any habitable basement space—including bedrooms and living rooms—and must meet specific size and accessibility criteria.
Beyond safety and compliance, egress windows also provide:
- Natural light
- Ventilation
- Improved basement aesthetics
- Increased home value
Read More: A Remodeler’s Guide to Basement Egress: Everything You Need to Know
Building Codes: Egress Window Requirements
Most regions in North America follow the International Residential Code (IRC) for egress window specifications. Here are the key requirements:
| Feature | Minimum Requirement |
|---|---|
| Clear opening area | 5.7 sq. ft. (or 5.0 sq. ft. for ground-level) |
| Minimum opening height | 24 inches |
| Minimum opening width | 20 inches |
| Maximum sill height | 44 inches above the finished floor |
| Window well dimensions | Minimum 9 sq. ft. with at least 36” projection |
| Ladder (if well >44″) | Required and must be permanently affixed |
Note: Local building codes may vary slightly, so always check with your municipality before installing.
Read More: Basement Sliding Door Ideas: Stylish Solutions for Light, Space & Privacy
When Do You Need an Egress Window?
You’re required to install an egress window if:
- You’re adding a bedroom to your basement
- You’re converting the basement into a living area
- Your current basement lacks a second exit
- You’re remodeling to meet modern codes
Even if not legally required, an egress window is a smart addition for any finished basement—it improves comfort, safety, and resale value.
Read More: 21 Basement Sliding Door Ideas to Brighten and Elevate Your Lower Level
Egress Window Styles: Which One Is Right for You?
Choosing the right style depends on your layout, personal taste, and local climate.
1. Casement Windows
- Crank-operated
- Ideal for tight spaces
- Provide large, unobstructed openings
- Best for most basement uses
Read More: Basement Patio Door Ideas: Brighten and Open Up Your Lower Level
2. Sliding (Glider) Windows
- Open side-to-side
- Easy to use
- May require a wider wall space
Read More: Benefits of Recessed Lights in the Basement
3. In-Swing Windows
- Open inward like a door
- Great for areas with tight outdoor clearance
Read More: Adding Lights to an Existing Circuit While Finishing the Basement: A Complete DIY Guide
4. Double-Hung Windows
- Traditional design
- Often not suitable due to smaller openings
Pro Tip: Casement windows are the most popular choice for egress use due to their large opening per square inch.
Read More: How to Do Basement Lighting the Right Way
Cost Breakdown: How Much Does an Egress Window Installation Cost?
Installing an egress window can vary widely in cost based on window size, excavation needs, and labor.
| Project Type | Estimated Cost |
|---|---|
| DIY Installation (minimal excavation) | $800 – $2,500 |
| Standard professional installation | $3,000 – $5,500 |
| High-end/custom installations | $6,000 – $10,000+ |
| Window well materials & cover | $200 – $1,000 |
Expert Advice: Always budget for additional costs like permits, drainage systems, and landscaping repairs post-installation.
Read More: Basement Lighting for Low Ceilings: Tips and Ideas to Brighten Your Space
Egress Window Installation: What to Expect
If you’re hiring a contractor, here’s a breakdown of the typical installation process:

1. Site Evaluation
Contractors assess your foundation type (concrete, block, or wood), soil conditions, and basement layout.
Read More: Top 9 Basement Lighting Ideas to Brighten Your Space
2. Excavation
They dig a window well and trench to install proper drainage and prevent water pooling.
Read More: Top Basement Lighting Ideas to Brighten Up Your Space
3. Foundation Cutting
A diamond-blade saw or concrete cutter is used to create the window opening—structural supports may be added.
Read More: Lighting Help for Our Low Ceiling Basement: Bright Ideas That Work
4. Window Installation
The window is installed, sealed, and waterproofed to prevent leaks and drafts.
Read More: Create a Light & Bright Basement With These Remodeling Tips
5. Well & Drainage Setup
A gravel base and drainpipe system are added to redirect water away from the house.
Read More: The Ultimate Guide to Basement Remodeling Lighting
6. Interior Finishing
Trim, drywall repair, and paint complete the indoor look.
Read More: What Are the Best Overhead Lights for an Unfinished Basement?
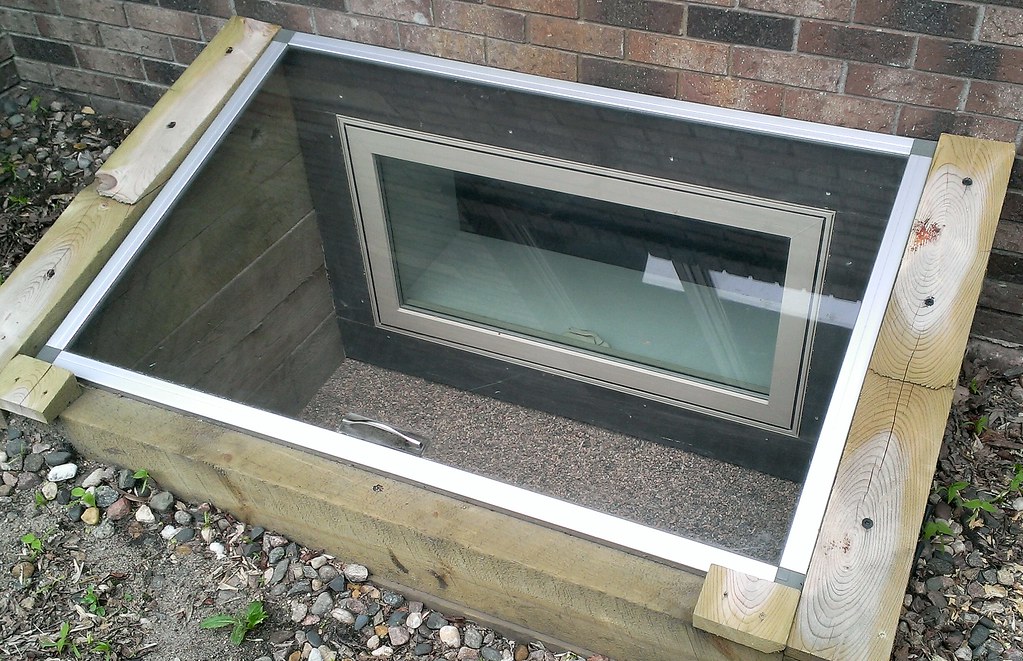
Designing Your Window Well: Style Meets Safety
The exterior view of an egress window can be more than a pit in the ground. Here’s how to beautify it:
- Install stone or faux-brick well surrounds
- Use clear polycarbonate covers for light and protection
- Add plants or ground cover around the area
- Consider built-in steps or a decorative ladder
Read More: Basement Lighting Ideas for a Brighter Space: Transforming Dark into Dazzling
DIY vs. Hiring a Pro: Which Is Best?
DIY Installation may work for handy homeowners, but cutting through a foundation can be dangerous and requires knowledge of:
- Structural engineering
- Drainage systems
- Local building codes
Professional Installation ensures:
- Code compliance
- Structural integrity
- Permits and inspections are handled
- Faster completion
Bottom Line: If your basement has concrete walls and you’re not confident in excavation or construction, hire a licensed contractor.
Read More: Considerations When Finishing Your Basement: The Ultimate Homeowner’s Guide
Maintenance Tips for Egress Windows
Once installed, keep your egress window functional with regular maintenance:
- Clear debris from the window well seasonally
- Check drainage after heavy rain
- Lubricate hinges and locks
- Ensure covers are crack-free and secure
- Avoid furniture or clutter blocking the interior access
Read More: HVAC Upgrades to Consider When Finishing Your Basement: A Complete Guide
Common Mistakes to Avoid
- Skipping permits (can result in fines or forced removal)
- Improper sizing (leads to failed inspections)
- Ignoring drainage (can cause flooding)
- Using improper window types (non-code-compliant)
- Poor placement (too high or blocked by furniture)
Read More: Best Way to Heat and Cool a Basement: Expert Guide for Year-Round Comfort
Benefits of Adding an Egress Window
Adding an egress window as part of your basement renovation has long-term benefits:
Legalizes basement bedrooms
Increases natural light and air circulation
Adds property value (up to 10% in some cases)
Makes your home safer for you and your family
Enhances home marketability and buyer confidence
Read More: Tips on How to Heat and Cool a Finished Basement: A Complete Homeowner’s Guide
Final Thoughts
An egress window isn’t just another feature in your basement renovation—it’s a requirement for safety, legality, and long-term property value. Whether you’re creating a guest room, home gym, or entertainment space, investing in a high-quality, properly installed egress window ensures your lower-level living space is not only beautiful but also safe and up to code.