
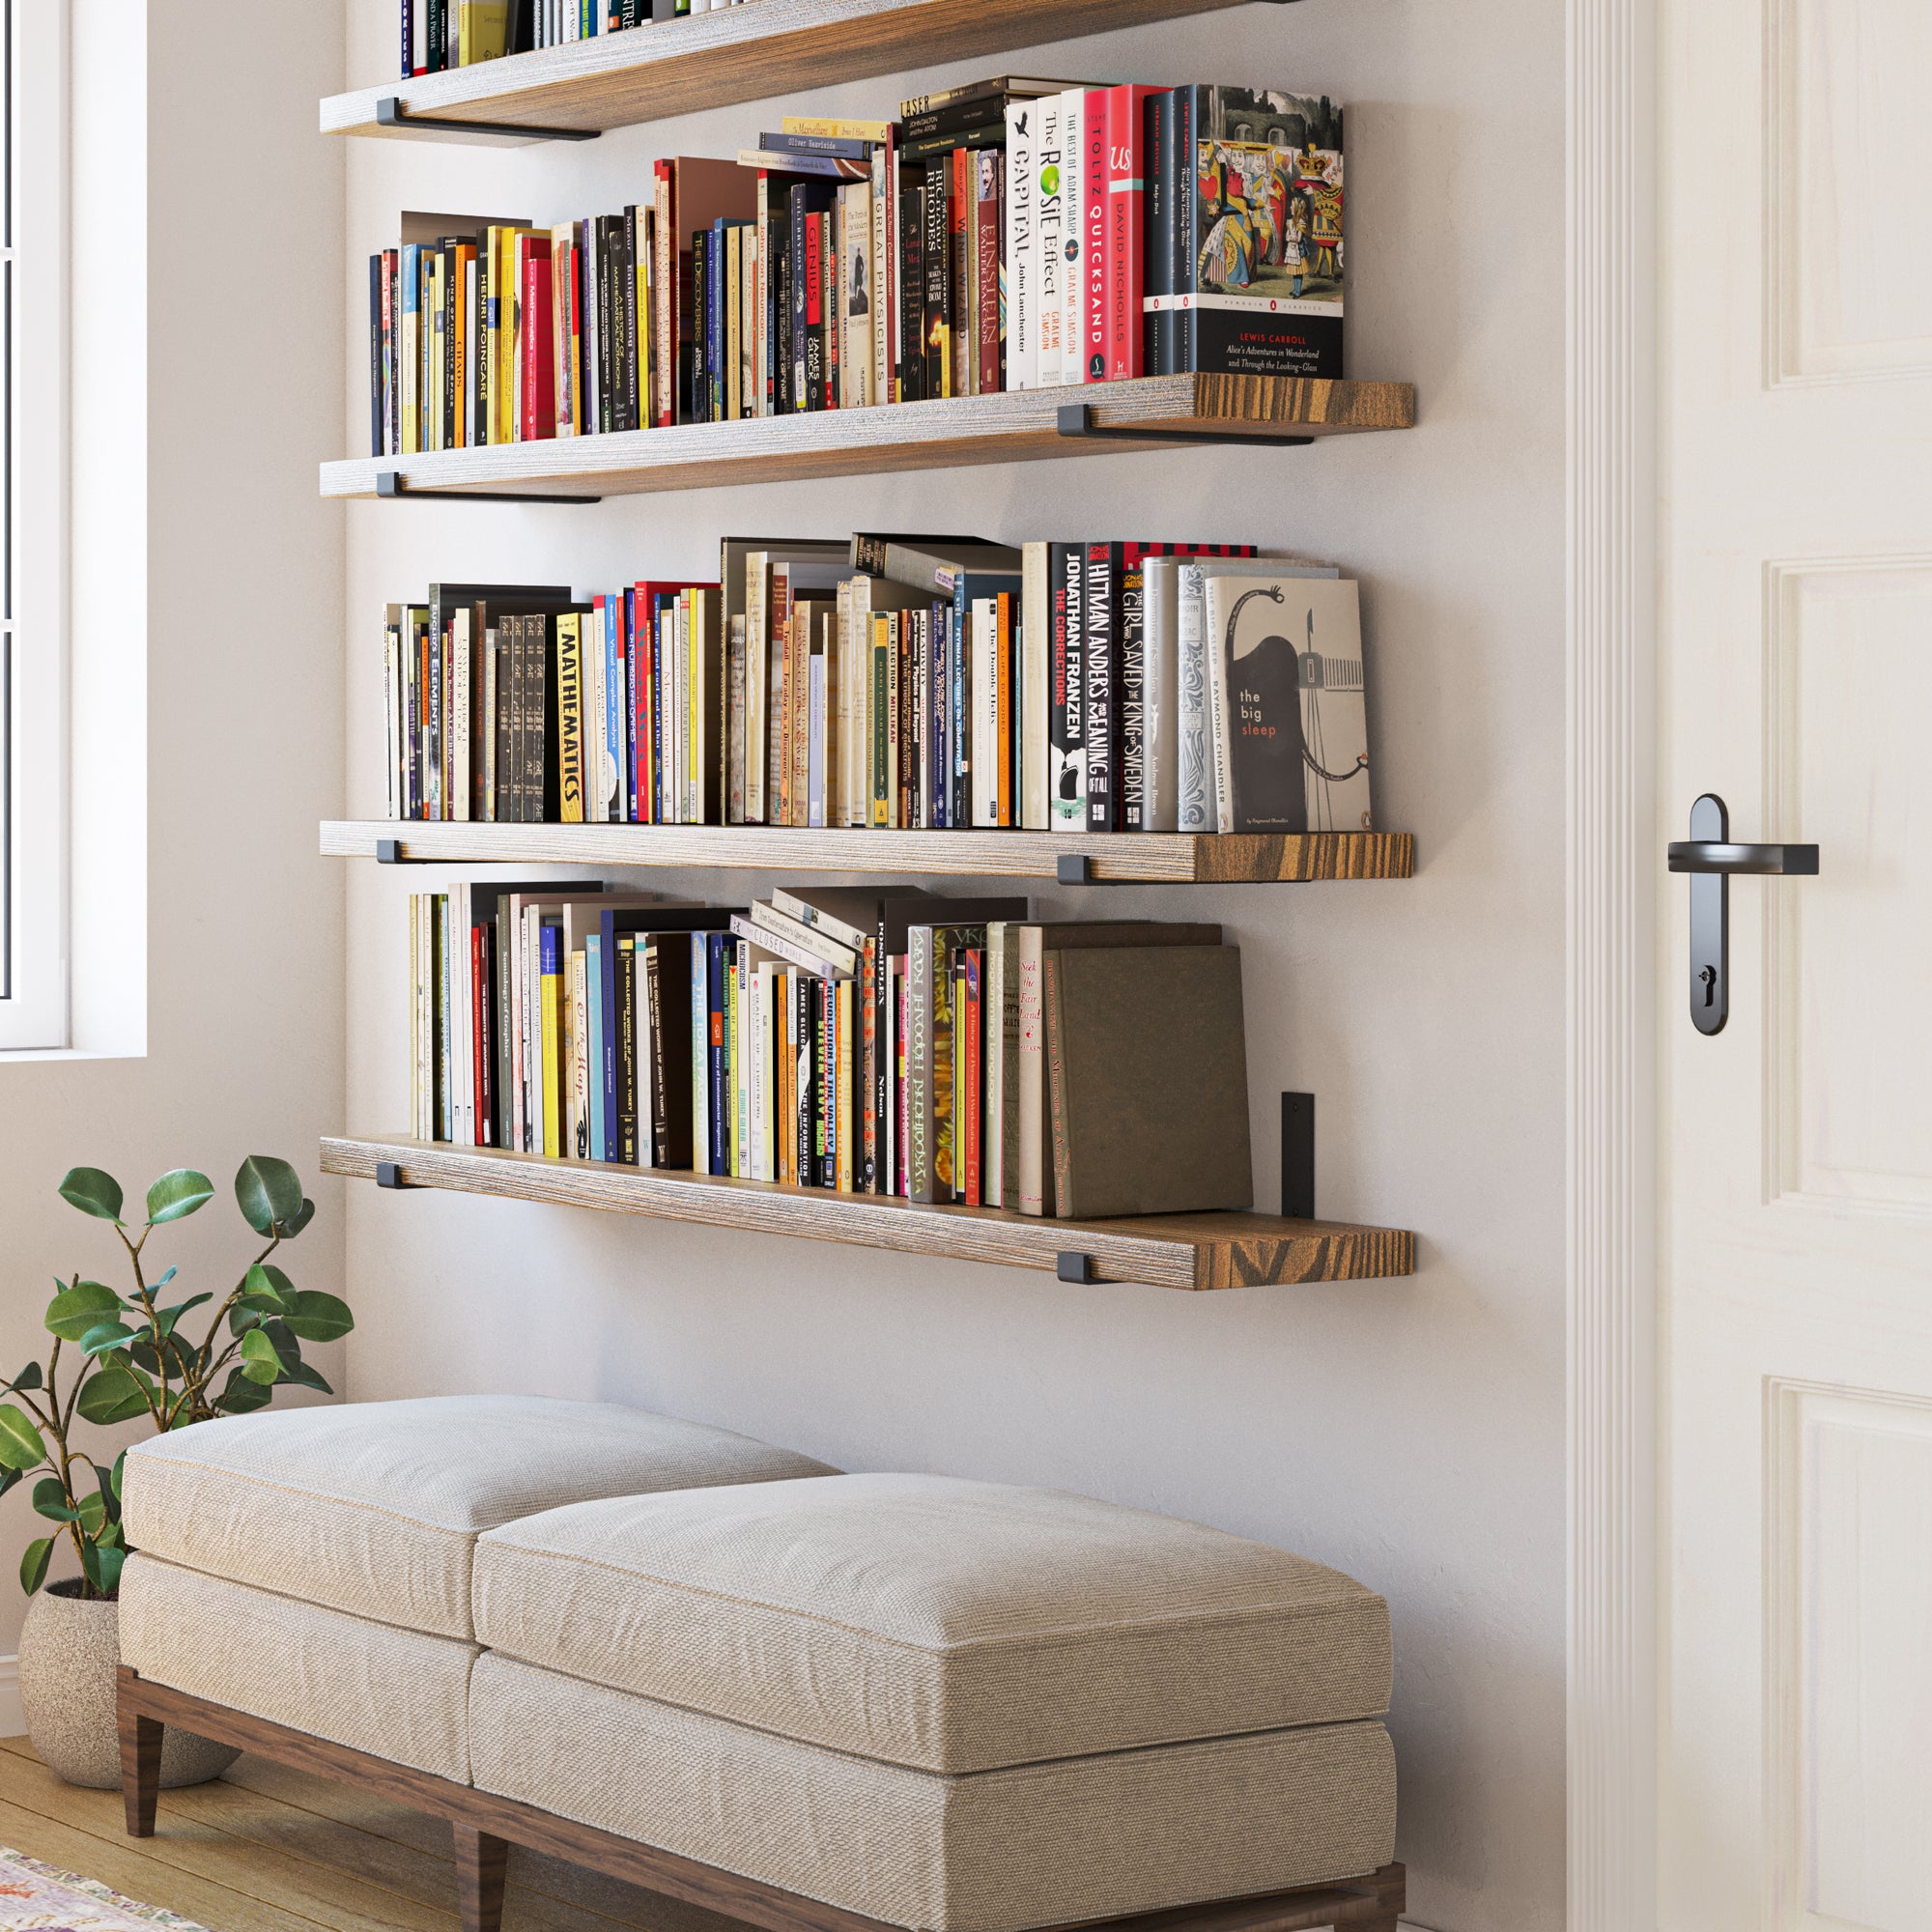
Looking to add style and storage to your space without bulky furniture? Floating bookshelves are a sleek and modern solution that can transform blank walls into functional art. Whether you’re organizing a reading nook, showcasing collectibles, or simply saving floor space, building floating bookshelves is a fun and budget-friendly project that anyone can tackle.
In this complete guide, you’ll learn how to make floating bookshelves with simple tools, affordable materials, and easy-to-follow instructions—no advanced carpentry skills needed.
Why Choose Floating Bookshelves?
Floating bookshelves are wall-mounted shelves with no visible brackets, giving them a clean “floating” appearance. They’re ideal for:
- Minimalist or modern home décor
- Small spaces with limited floor space
- Kids’ rooms, living rooms, bedrooms, and hallways
- Displaying books, photo frames, or decorative objects
Read More: Where Can I Buy Cheap Kitchen Cabinets? | 2025 Budget-Friendly Guide
Tools & Materials You’ll Need
Before you begin your DIY project, gather these essential tools and materials:
Tools:
- Drill and driver bits
- Circular saw or miter saw
- Stud finder
- Level
- Measuring tape
- Screwdriver
- Sandpaper or power sander
- Clamps (optional but helpful)
Read More: How Much Does Remodeling a Kitchen Cost? | Complete Cost Breakdown (2025 Guide)
Materials:
- 1″ x 8″ or 2″ x 8″ wood boards (length varies based on wall space)
- Wood screws (2.5” or longer)
- Floating shelf brackets or wall cleats
- Wood filler
- Paint or wood stain
- Wall anchors (if no studs are available)
- Polyurethane or sealant (optional for durability)
Optional: Edge banding or trim for a more polished finish.
Read More: How to make old kitchen cabinets look new?
Planning Your Floating Bookshelves
Before cutting or drilling, take a few minutes to plan:
1. Shelf Size
- Length: 18″ to 36″ is common for bookshelves
- Depth: 8″–10″ is ideal to fit most book sizes
- Thickness: 1.5″–2″ looks modern and holds more weight
Read More: What are the options for replacing kitchen cabinets?
2. Placement & Spacing
- For multiple shelves, leave at least 12″–15″ vertical spacing between shelves to accommodate books.
- Leave 20″+ spacing if using large décor or tall books.
Read More: How do you calculate the costs for a kitchen remodel?
3. Wall Mounting
- Use a stud finder to locate wall studs.
- If no studs are available, use heavy-duty drywall anchors.
Read More: How to redo kitchen cabinets?
Step-by-Step Guide: How to Make Floating Bookshelves
Step 1: Cut the Wood to Size
Cut your wood boards to the desired length using a miter saw or circular saw.
For example:
- (3) 1″ x 8″ boards at 30” each = three floating shelves
Pro Tip: Sand the edges after cutting to smooth out splinters.
Read More: What is the most affordable cabinet material for my kitchen?
Step 2: Drill Holes for Floating Brackets (If Using Metal Brackets)
If you’re using concealed floating shelf brackets:
- Measure and mark where the brackets will go.
- Drill holes in the back edge of each board to fit the bracket arms.
Use a paddle bit or spade bit matching the bracket size (usually 1/2″ or 5/8”).
Alternate Method: Build a hollow box shelf and slide it over a wall-mounted cleat (cleat method detailed below).
Read More: How difficult is it to build your kitchen cabinets?
Step 3: Find Studs and Mark the Wall
:strip_icc()/bhg-how-to-use-a-stud-finder-06-9352_8uTqnNMxqAs9Dpt5GLvRWh-96a4318c68cb421b95fd255bda5ec988.jpg)
Use a stud finder to locate wall studs.
- Mark bracket positions with a pencil.
- Use a level to ensure a perfectly horizontal line—critical for bookshelves.
Read More: What is the most affordable cabinet material for my kitchen?
Step 4: Install the Brackets or Cleats
Method A: Bracket-Based Shelves
- Screw the metal brackets into studs or wall anchors.
- Use a level to make sure each bracket is perfectly aligned.
Read More: What can I do to plan for a kitchen remodel?
Method B: Cleat-Based Shelves
- Mount a 2×2 cleat to the wall (cut slightly shorter than the shelf length).
- Drill into studs using long screws.
- Your shelf will slide over this cleat like a sleeve.
Read More: What are the best ways to build kitchen cabinets?
Step 5: Attach the Shelf
For Bracket Shelves:
- Slide the shelf onto the bracket arms.
- Use screws underneath (if predrilled) to secure the shelf to the brackets.
Read More: How to plan a successful kitchen remodeling project?
For Cleat Shelves:
- Build a hollow shelf (3-sided box: top, bottom, front).
- Use wood glue and screws or nails.
- Slide the box over the cleat and secure it from the top with screws into the cleat.
Read More: How to choose kitchen cabinets when remodeling?
Step 6: Sand, Paint, or Stain
Once mounted, give your shelves a professional finish:
- Sand with 220-grit sandpaper for a smooth touch.
- Apply wood stain for a rustic or warm look.
- Use paint for a clean, modern aesthetic.
- Seal with polyurethane for moisture resistance, especially in humid areas.
Tip: Fill screw holes or gaps with wood filler for a flawless finish.
Read More: How do you buy kitchen cabinets on a budget?
Floating Bookshelf Summary Table
StepAction
Measure & plan Decide size, spacing, and location
Cut the wood Use quality lumber; sand after cutting
Drill holes For brackets or make hollow shelves
Mount brackets Into wall studs or anchors
Attach shelves Slide onto brackets or cleats
Finish shelves Stain, paint, and seal as desired
Read More: How to do DIY kitchen cabinetry and countertops cheaply?
Floating Bookshelf Styling Ideas
Now that you’ve built your shelves, here are some ways to decorate them:
- Books: Stack vertically or horizontally for variation
- Plants: Use small succulents or trailing greenery
- Frames: Lean artwork or photos against the wall
- Candles or figurines: Add ambiance and texture
- Baskets or boxes: Hide small items while adding style
Read More: How does interior remodeling enhance a home?
Safety and Load Tips
- Always anchor into wall studs when storing heavy items, such as books.
- Don’t exceed the bracket’s weight capacity—typically 40–75 lbs per shelf.
- Use two or more brackets for shelves over 30″.
Read More: What’s a Great Way to Improve a Room for Less Than $100?
FAQs
Can I build floating bookshelves without a bracket?
Yes! Use the cleat method, where a hollow box shelf slides over a wall-mounted wood cleat. It’s strong and offers a sleek, bracket-free look.
Read More: How to Make My Living Room More Cozy: The Ultimate Guide to a Warm and Inviting Space
What’s the best wood for bookshelves?
- Pine: Affordable and easy to work with.
- Poplar or Oak: More durable and attractive grain.
- Plywood with edge banding: Lightweight and economical.
Read More: How Can Home Interior Design Transform Your Living Space?
How long do floating bookshelves last?
If mounted properly, they can last 10 years or more and support consistent weight. Wall studs and finish quality are key to longevity.
Read More: How to Remodel My Garage Into a Living Space: A Complete Homeowner’s Guide
Final Thoughts
Creating your floating bookshelves is one of the most satisfying and functional DIY projects you can do. It combines style, utility, and space-saving design—all without needing professional help or a big budget.
Whether you’re organizing your home library or adding modern flair to a room, floating bookshelves let you showcase your personality while keeping things tidy and accessible.