
Structuring kitchen cabinets can be a fulfilling and economical job if you’re handy with tools and desire a custom kitchen appearance. Whether you’re aiming for a full DIY build or simply putting together ready-to-assemble (RTA) cupboards, understanding the most effective techniques, products, and building and construction methods is crucial for creating durable, stylish, and functional cabinets.
Here’s a comprehensive guide to the best methods for building kitchen cabinets, including expert tips and step-by-step instructions.
Why Build Your Kitchen Cabinets?
- Save Money – Custom cabinets can cost $500–$ 1,000 or more per linear foot. DIY builds often cost a fraction of that.
- Custom Sizing – Tailor cabinets to your space.
- Satisfaction – Personal accomplishment and full design control.
Read More: How to plan a successful kitchen remodeling project?
Essential Tools You’ll Need
- Table saw or circular saw (with guide)
- Drill/driver
- Kreg pocket hole jig (for hidden joinery)
- Clamps
- Tape measure, level, square
- Brad nailer or hammer and finish nails
- Wood glue
- Sandpaper or orbital sander
Optional but helpful:
- Router (for edge profiles)
- Dado blades (for groove joints)
- Cabinet jack or third-hand tool (for installation)
Read More: How to choose kitchen cabinets when remodeling?
1. Choose the Right Materials
Cabinet Box (Carcass) Materials:
- Plywood (¾””) – The best option for strength and durability.
- MDF (Medium-Density Fiberboard) – Smooth and affordable, but heavier and less moisture-resistant.
- Melamine or Particle Board – budget-friendly but not durable in the long term.
Read More: How do you buy kitchen cabinets on a budget?
Door and Face Frame Materials:
- Hardwood – Maple, birch, oak, or poplar for durability.
- MDF – Ideal for painted doors (no wood grain to show through).
- Plywood – Lightweight and stable; can be veneered or painted.
Read More: How to do DIY kitchen cabinetry and countertops cheaply?
2. Design Your Cabinet Layout
Sketch your kitchen and decide:
- Base cabinets (typically 24″” deep, 34.5″” high)
- Wall cabinets (12″”–15″” deep, 30–42″” high)
- Tall pantry or oven cabinets
- Open shelves or closed storage
- Drawers vs. doors
- Corner cabinet solutions (lazy Susan, blind corner)
Use software like SketchUp, Cabinet Planner, or IKEA Home Planner to create accurate maps of dimensions and cut lists.
Read More: How does interior remodeling enhance a home?
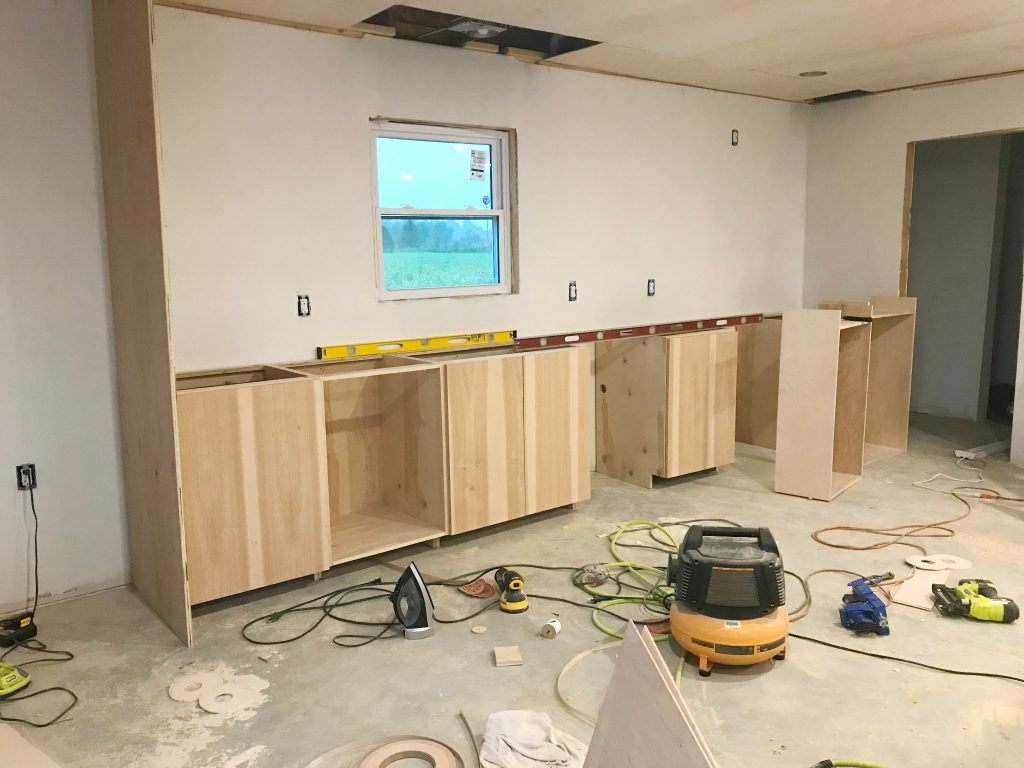
3. Cut and Build the Cabinet Boxes
Standard Cabinet Box Structure:
- Sides (left and right)
- Top and bottom
- Back panel
- Toe kick (optional for base cabinets)
Read More: What’s a Great Way to Improve a Room for Less Than $100?
Construction Steps:
- Cut all panels to size using a table saw.
- Drill pocket holes for joints (bottom and top panels into sides).
- Assemble the box using glue, pocket screws, and clamps.
- Attach the back panel (¼”” plywood or hardboard) with brads or staples.
- Add a face frame (optional for a framed look) using hardwood stiles and rails.
Pro Tip: Keep everything square—measure diagonals to ensure accuracy.
Read More: How to Make My Living Room More Cozy: The Ultimate Guide to a Warm and Inviting Space
4. Build or Buy the Cabinet Doors
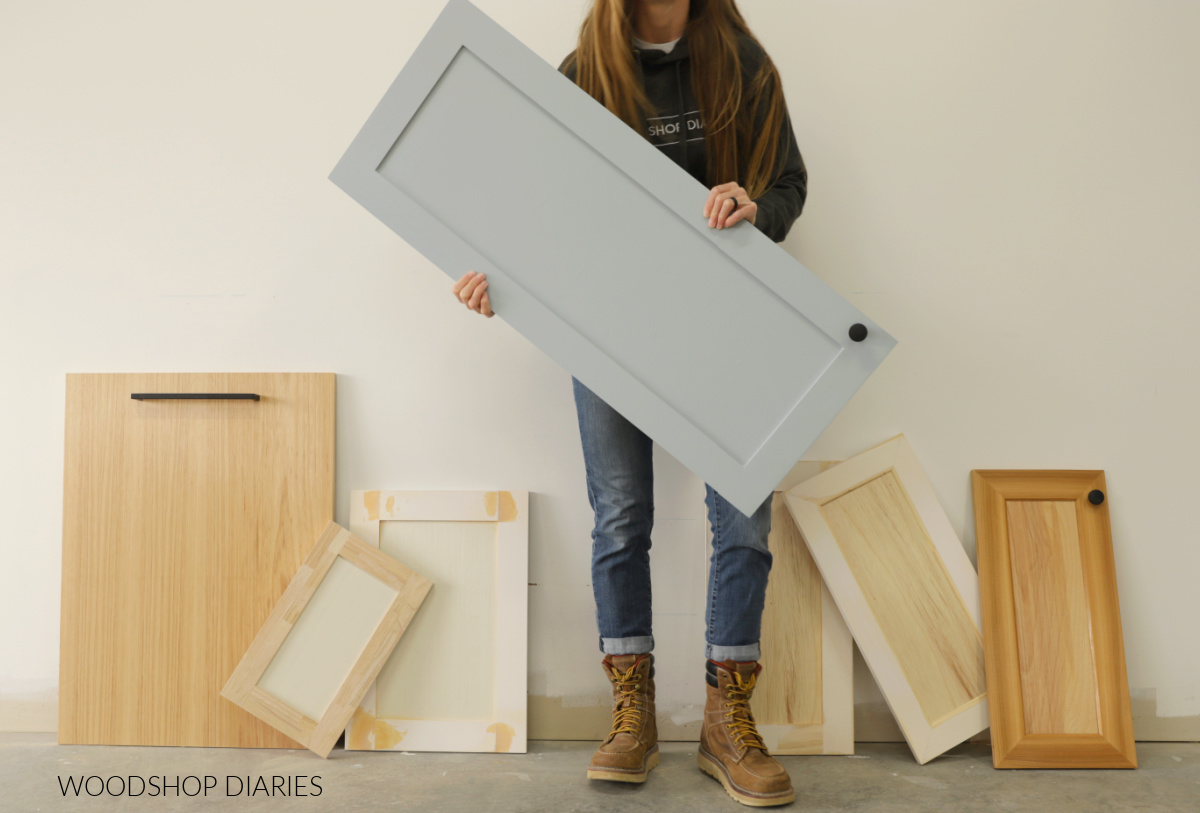
DIY Door Options:
- Shaker-style: Easiest for beginners. Made with a plywood or MDF center panel and hardwood rails/stiles.
- Slab-style: Flat plywood or MDF panel with edge banding for a modern look.
- Raised panel: More complex, needs a router and multiple passes.
Read More: How Can Home Interior Design Transform Your Living Space?
Door Building Steps:
- Cut stiles and rails (for shaker doors).
- Cut the center panel to fit inside the groove or rabbet.
- Assemble with glue and clamps.
- Sand edges smooth.
- Paint or stain before attaching.
Alternative: Buy pre-made cabinet doors online and build the boxes yourself.
Read More: How to Remodel My Garage Into a Living Space: A Complete Homeowner’sHomeowner’s Guide
5. Add Drawers (Optional)
Drawers offer functional storage but are slightly more advanced in design.
Steps:
- Build drawer boxes from ½” or ¾” plywood.
- Use pocket holes or dados for joinery.
- The mount drawer slides inside the cabinet.
- Align and attach drawer faces.
Use full-extension ball-bearing drawer slides for a professional finish.
Read More: What Should I Consider When Planning a Renovation? A Complete Guide for Homeowners
6. Install Cabinet Hardware
- Use concealed Euro-style hinges (soft-close) for a modern, clean look.
- Use a jig for accurate placement of the handle and pull.
- Install adjustable shelves with shelf pins.
- Attach magnetic catches if needed.
Read More: The Easiest Way to Redesign a Small Living Room: Smart Tips for a Stylish Makeover
7. Finishing and Installation
Finishing Tips:
- Fill holes and sand all surfaces.
- Prime and paint or stain and seal.
- Use high-quality cabinet paint or furniture-grade stain and polyurethane.
Read More: How Long Does It Take to Renovate a Living Room? A Complete Timeline and What to Expect
Installation Steps:
- Start with wall cabinets first to avoid working over base cabinets.
- Use a level and ledger board to hold cabinets during installation.
- Shim to level if walls or floors are uneven.
- Secure the cabinets to the wall studs with long cabinet screws.
- Install face frames (if separate), doors, and drawers last.
Read More: 15 Easy DIY Projects for a New Apartment: Budget-Friendly Ideas to Make It Yours
Maintenance and Longevity Tips
- Use water-resistant finishes in kitchens (polyurethane or cabinet-grade paint).
- Avoid particle board near sinks—opt for plywood instead.
- Use soft-close hardware to reduce wear.
Read More: How to Extend a Living Space for Less Cost: Smart Budget-Friendly Ideas
Final Tips for Success
Build a prototype cabinet first if you’re new
Always double-check measurements
Label parts and pre-drill holes
Watch YouTube tutorials for visual learning (e.g., Fix This Build That, Ana White)
Be patient—quality takes time!
Read More: What Should I Consider When Trying to Remodel My Living Space?
Bonus: Pre-built or RTA Alternatives
If building from scratch feels overwhelming, consider:
- RTA cabinets: Assemble yourself, available from IKEA, Cabinets.com, etc.
- Pre-built carcasses and custom doors: Saves time while offering customization.
Read More: How to Create a Modern-Looking Living Room on a Budget
Final Thoughts
Structuring kitchen cabinets isn’t simply a woodworking task —it’s a chance to create a personalized, practical, and state-of-the-art kitchen. With outstanding preparation work, the ideal products, and mindful implementation, you can conserve thousands and build something lasting.